How To Create A Google My Business Account
If you’re a new business or haven’t set up a Google My Business profile yet, you may not have found a whole lot.
From just a Google search, your potential customers should be able to answer any question they may have about your business including:
- Your location
- Your phone number
- Your website
- Your hours
- Your average rating
- Your reviews
- And maybe even a few photos
Without setting up a Google My Business account, it’s very difficult to have control over these answers on the world’s most popular search engine.
This makes it more difficult to manage your business's online reputation and have control over what is often your customers’ first experience interacting with you.
Fortunately, setting up an account is easy to do and doesn’t take too much time. Let’s go through this step-by-step.
Step 1: Create a Google Account
Step 2. Go to www.business.google.com
Step 3: Enter Your Business Name
Step 4: Enter Your Location & Delivery
Step 5: Tell Google what areas you serve
Step 6: Choose a Business Category
Step 7: Add Contact Details
Step 8: Finish and Verify Your Business
Step 1: Create a Google Account
If you haven’t already, take a moment to create a Google account. This account should be entirely related to your business. Ideally, it should be set up with your domain name (i.e. mark@yourcompany.com). However, a Gmail account will work just as well.
Step 2: Go to www.business.google.com
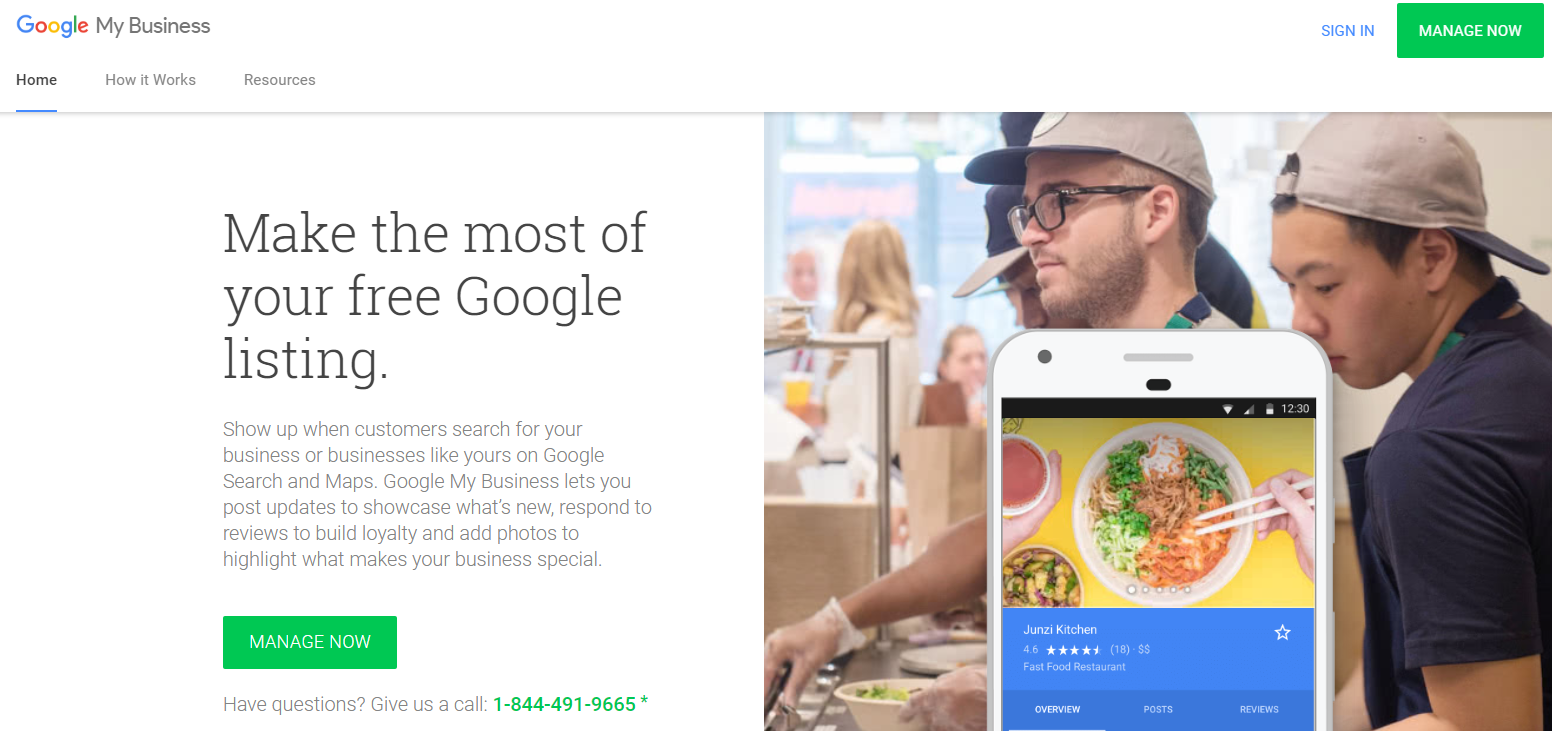
From here, you can learn more about the Google My Business account. This account, once it’s been set up, will allow you to manage your business listing, publish online updates, respond to reviews, and add photos.
With the account, you’ll be able to access your dashboard at any point – no matter where you are – with the mobile app. That means when a review or question comes, you and your employees will be able to jump on providing a response and winning a new customer immediately.
Once you’re on the Google My Business page, click the big green “Manage Now” button.
Step 3: Enter Your Business Name
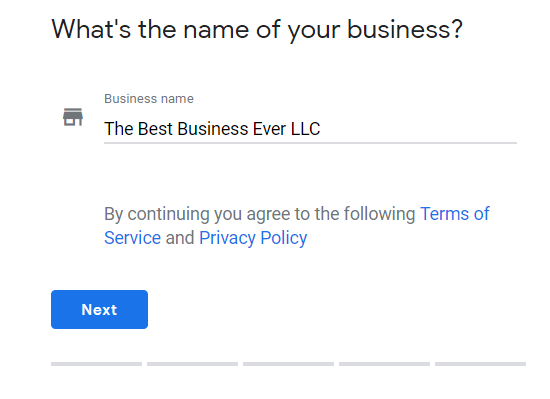 This part is easy – simply enter your business name. If you have multiple names (DBAs), use the one most commonly recognized by your customers.
Step 4: Enter Your Location & Delivery
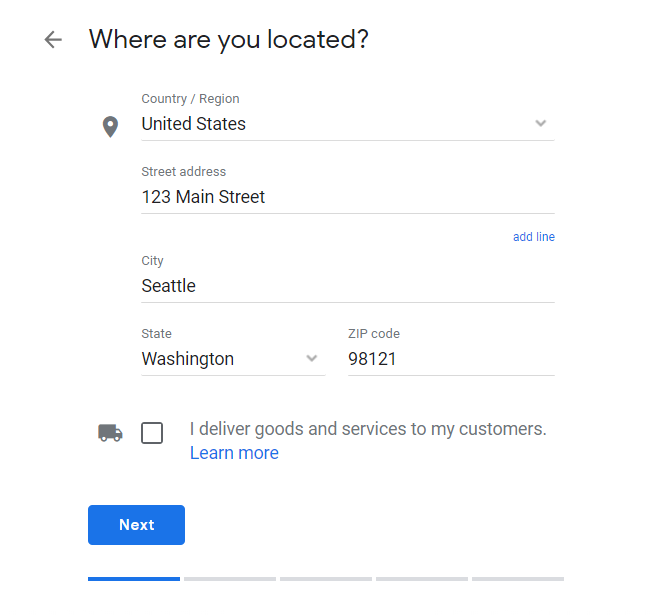 Type in the address where your business is located.
Important: If you’re a service-based business (and you don’t have a physical location), select the “I deliver goods and services to my customers” and then select “Hide my address” to make sure your address isn’t shown on your listing.
Step 5: Tell Google what areas you serve.
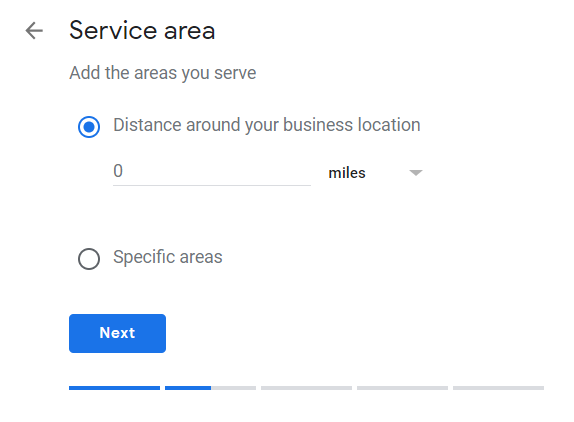 Now it’s time to tell Google what areas you serve.
If you’re a service-based business without a primary location, select “Specific areas” and type in the regions you serve.
If you do have a physical location and only serve people within a certain radius, select “Distance around your business location” and type in as many miles or kilometres as you’d like.
Note: If you have multiple business locations, just use the primary location for now. We’ll get to adding more locations shortly.
Step 6: Choose a Business Category
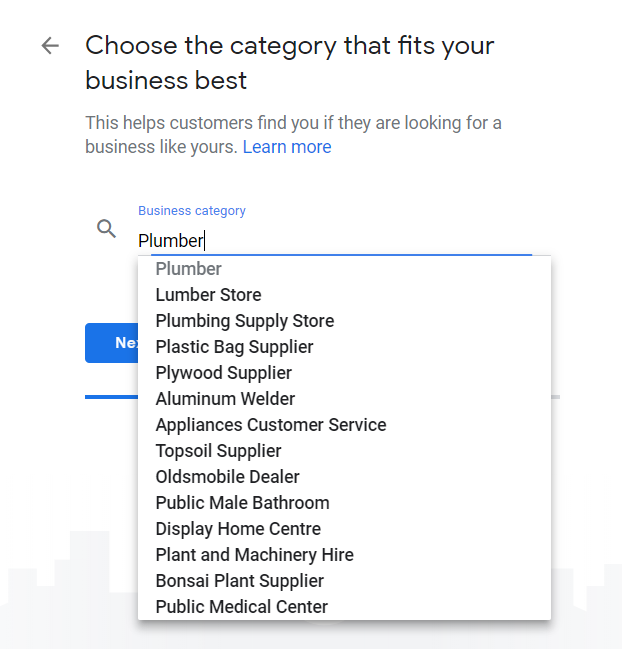 Let’s tell Google what kind of business you do. Start typing in letters and a menu of options will pop up showing you various categories you can use.
If there is more than one category that applies, just choose the one that best fits your business. You can change or add more later on.
Step 7: Add Contact Details
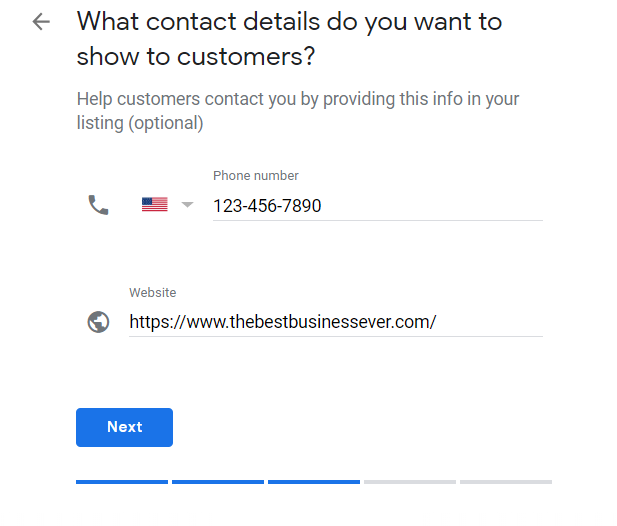 How can your customers get a hold of you? Enter the best phone number and website for your business.
Note: This portion is completely optional, but the more information you have filled out, the higher chance you have of converting more customers!
Step 8: Finish and Verify Your Business
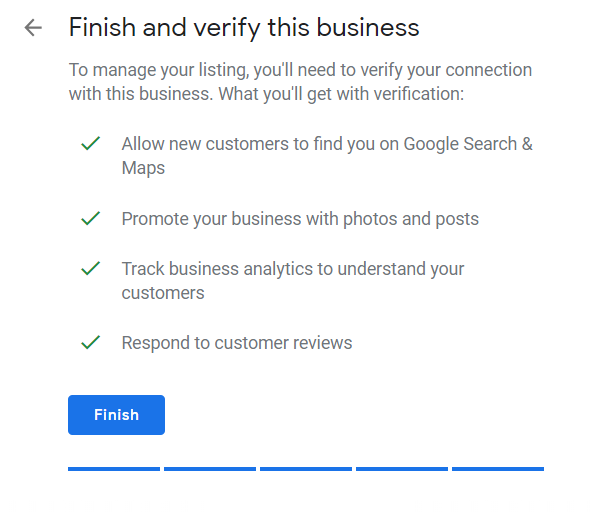 Once you finish getting all your details entered into the system, Google has to complete their verification process and make sure you have permission to claim this listing. This ensures no one else can claim your business listing!
To verify your listing, Google will send a postcard to the address you entered before. Simply type in your name and click “Mail” to receive a postcard within five business days.
Once you receive the postcard, it’ll walk you through the steps to complete verification. From there, you’re all set and your Google My Business account has been created!
Until then, you’ll have limited access to your dashboard which will look a little bit like this:
If you have multiple locations, this is the time to go in and add them. At the very bottom left corner of your dashboard, you should see a button that says, “Add Location.”Click that button and repeat the process for each additional location you have.
Otherwise, while you wait for the postcard to show up, take some time to complete your listing by adding your business’ hours, any missing contact information, a business description, and a profile photo.
This information will help ensure potential customers can find and recognize you right off the bat. As you’re adding this information, remember this is your first impression, so make it a good one!
After you’ve completed your listing, take a look at the rest of your dashboard and familiarize yourself with it. Come up with a schedule to check your reviews and questions regularly so you don’t miss any.
For more ways to further optimize your new account, check out our Ultimate Guide to the Google My Business Page here. Now that you have your Google My Business account set up, you’re all set to start collecting reviews. We’ve made it easier than ever to ask for reviews and link your customers directly to your Google listing.
With our app, it’s easy to send a link to the review right on the spot, even if you operate in multiple locations. Once your employees have downloaded it, they can send a custom link to your customers’ phones within seconds of completing their transaction.
Not only does this give you a better chance of getting that Google reviews even before they leave, but you will also be able to capitalize on the personal connection that your employees have established with the customer.
Related Articles
Giving Your Marketing Agency Access to Google Analytics Account
Your marketing agency may require access to your Google Analytics account in order to effectively assist you in analysing data, preparing monthly reports and providing continual improvement in all your marketing efforts. Giving your agency access in ...Google Domination
Let's face it if you're not on Google these days; you don't exist! With more than 78% of all searches taking place on Google, now you know why you have to be on it! ? We achieve spectacular results for you on all search engines, especially Google, ...Create a Facebook pixel in Business Manager
The Facebook pixel is a piece of code that's placed on your website to report conversions, build audiences and get insights about how people are using your website. You can create up to 100 pixels in your Business Manager account. You may want to ...Add people to your Ad Account
If you want to manage your ads with other people, you can add them to your ad account. You can give people the following roles based on what permissions you'd like them to have: Ad account admin: Admins can create, edit and view ads, access reports, ...Add Ad Accounts in Business Manager
In your Business Manager, you can add ad accounts that you own and get access to ad accounts that other people or businesses own. In the Ad accounts section of your business settings, you'll see ad accounts that you own and ad accounts that you have ...